Fire Dragon Hat Instructions
These instructions are great for each version of Fire Dragon you might have.
What you’ll need
Print it myself version:
At least 9 sheets of 8.5 x 11” (or A4) computer paper or cardstock.
Ink for your printer.
Glue
Scissors
If you print on computer paper:
~2 sheets of Poster board (only if you printed to computer paper.)
Deliver to me version:
Glue
Questions about materials? Check out our crafting supplies guide.
Follow along with an instructional video.
You can read through the step by step instructions are below.
If you need extra help, click on the step title to load the video from that step.
Instructions

Printed on computer paper? It’s time to ply. Follow our plying instructions and pick up at step 2 once you’re done.
Printed on cardstock? Cut out all the pieces before moving to step 2.
Got a deliver to me costume? Gently separate out each piece and you’ll be ready for step 2.

Find these two pieces that glue together in the middle and glue them together. Make sure the two tabs are both on the underside of the art.

Questions about icons used in these instructions? Check out our crafting tips guide.

Glue the next largest spikes. Give some time for the glue to set before moving on.

Glue the spiky ridges to each side. When you’re done, set this piece aside for now.
Go to this step in the follow-along video >

Find the two halves that match in the middle, and make sure it has a cut in two places.

Glue the two halves together, this is the base of the face.

Find the two small spikes with the small tabs, and glue them to the face base.

Add glue to the center of the spikes, then insert the face base bottom tab through the slot.


Glue the dragon’s face to the piece with the matching glue outline.

Find the remaining small spikes and glue them to each side of the face.

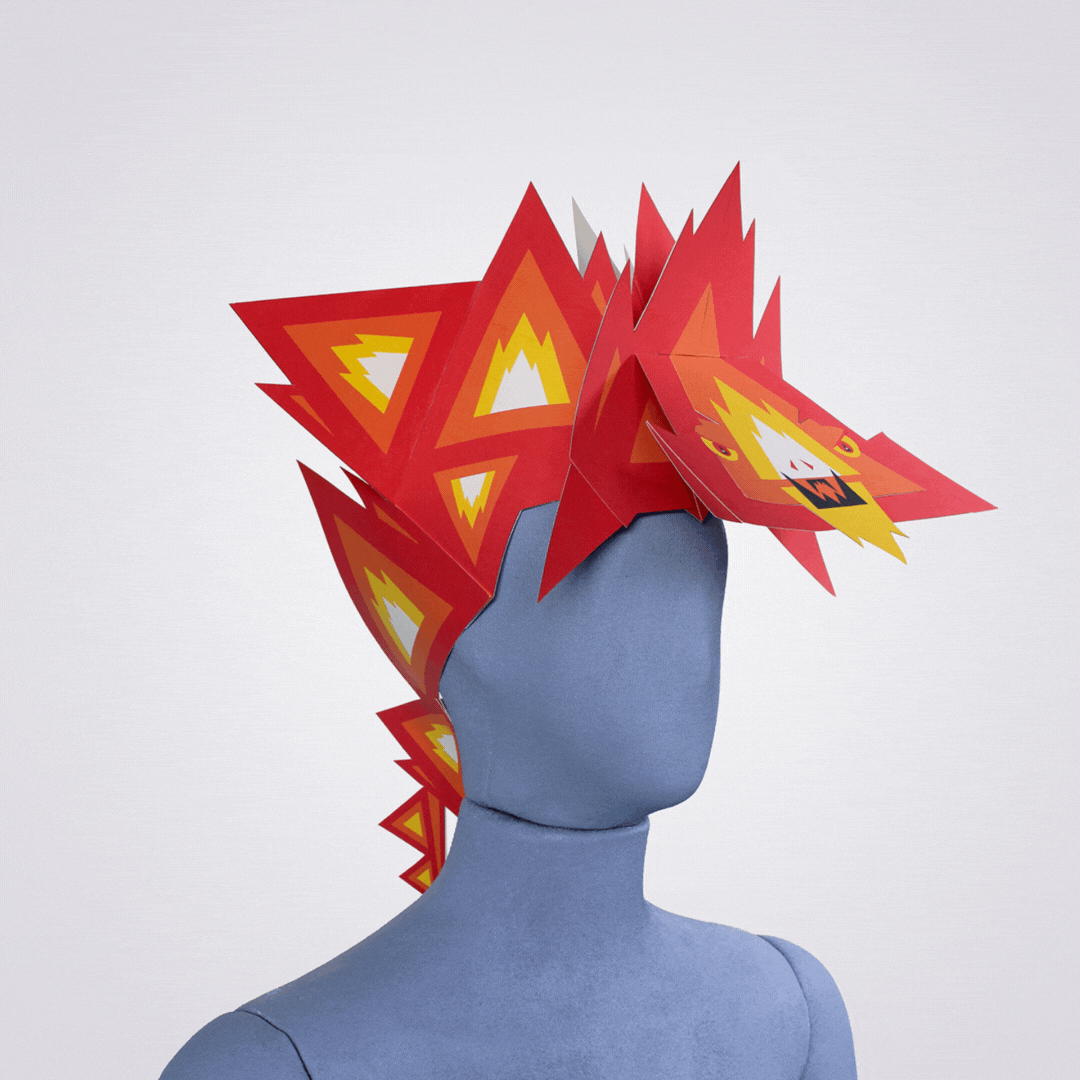
Time to decorate!
Your costume is almost finished and from here on it will no longer lay flat. If you want to decorate it—the best time is now!


Insert the top of the face through the slot in the face base. Push it through a little, then grab and pull from the other side.


Fold the rectangle piece over until two sides overlap then glue them together to make a triangular prism.

Add glue to the glue tabs on the prism, then place it under the face.

The prism should be nested, propping up the face from the base.

Slightly fold down the two spikes on the top of the band.
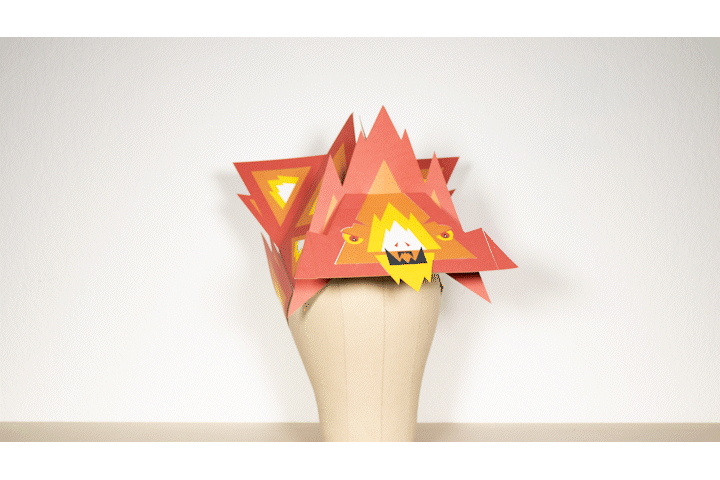
Put it on!
Let’s get your hat fitting snug.

Take the two free ends of the band and put them together around the head.

The hat should rest at the top of the forehead, such that you can see easily without the hat blocking your vision. Cinch the two ends together so the hat rests snug.

Glue or staple the ends together where you’ve cinched it in the back.
When the glue dries, your hat is ready to go!